What Are Some Fun DIY Projects With House Plants?
Last Updated: July 23rd, 2021
House plants are a great addition to your home interiors. They not only add charm and beauty to your home but also help purify the air. The best of all is, even if you don’t have enough space, you can still enjoy some fun DIY projects with house plants.
Want to transform your home interior into a classic indoor garden? Looking for some DIY projects with the house plants? If yes, you’ll find all the details in this post. So, stop searching right here and read the article till the end.
In this article, you’ll discover how to make Kokedama, Moss terrarium, driftwood succulent centerpiece, and miniature Bonsai moss garden.
Let’s dive in to know more details.
1. What Is Kokedama?

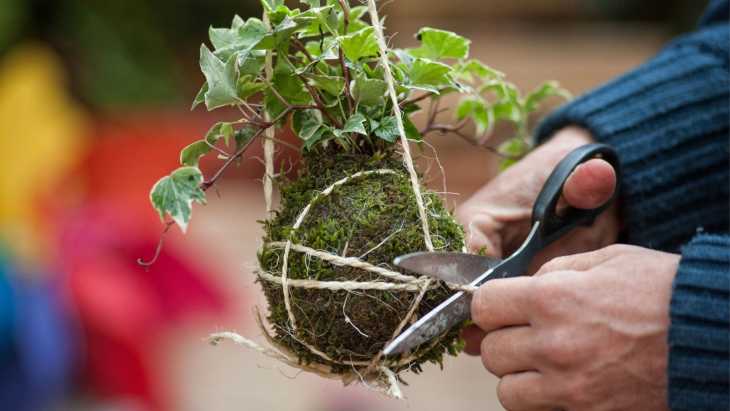
Kokedama is a Japanese idea to style houseplants with moss balls. Kokedama means “moss ball” in English. It is also known as poor man’s Bonsai. It has evolved from the centuries-old tradition of styling Bonsai root balls on a plate. In that styling technique, moss was grown on the Bonsai roots to enhance its beauty.
In Kokedama, common household plants are planted in a spherical ball of potting mix. This ball is further wrapped in a layer of moss. Therefore, it doesn’t require a pot.
Initially, this technique was popular only in Japanese gardens. But now, it has become famous throughout the world.
How to Make Kokedama?
You might be thinking about how to make Kokedama? Is it tricky? No, it is quite simple. You’ll need your favorite houseplants, potting mix, thread or twine, and, fresh or dried sheet of moss.
You can make Kokedama from almost any plant but make sure to select one that suits your environment. Hanging Kokedama is an ideal choice if you don’t have enough flour or shelf space.
For dark environments such as apartments with no window facing the sun, philodendron and pothos are the best options. If you have sunny spots in your home, use light tolerant plants such as citrus, ficus, or croton. If you have both sunny and shady spots, you can use a variety of shade-loving plants for making Kokedama.
Material Required:
House Plants (You can use Jade, Pothos, Philodendron, a variety of ferns, Pothos, Begonias, Spider plants)
Twine
Potting mix (consisting of perlite and peat moss)
Sheet Moss (Fresh or dried)
Water
Scissors
Instructions:
Moisten the potting mix so that you can easily shape it in the form of a ball without crumbling.
Make a hole in the center of the ball by using your fingers.
Take out the house plant from its pot. Use fingers to remove extra dust from the roots.
Place the plant inside the hole and add more potting mix if required.
Lay the moss sheet on your work surface and place the ball on it.
Wrap the moss sheet around the ball.
Use twine and securely tie the ball from all sides.
Don’t tie it loosely. Otherwise, it will hardly be suspended.
Take another piece of twine. Tie it on both sides and hang the ball.
Watch this videoto learn the steps more clearly.
How to Care for Kokedama?
For watering Kokedama, soak the ball in a bucket of water for 10 to 15 minutes once a week. Then gently squeeze it to remove the extra water. Between watering, misting will help to keep it fresh and green.
Depending on the type of house plant you selected, hang the ball at a sunny or shady spot.
Where You Can Get DIY Kokedama Kit Sets?
You can get DIY Kokedama Kits from
2. What Is Moss Terrarium?

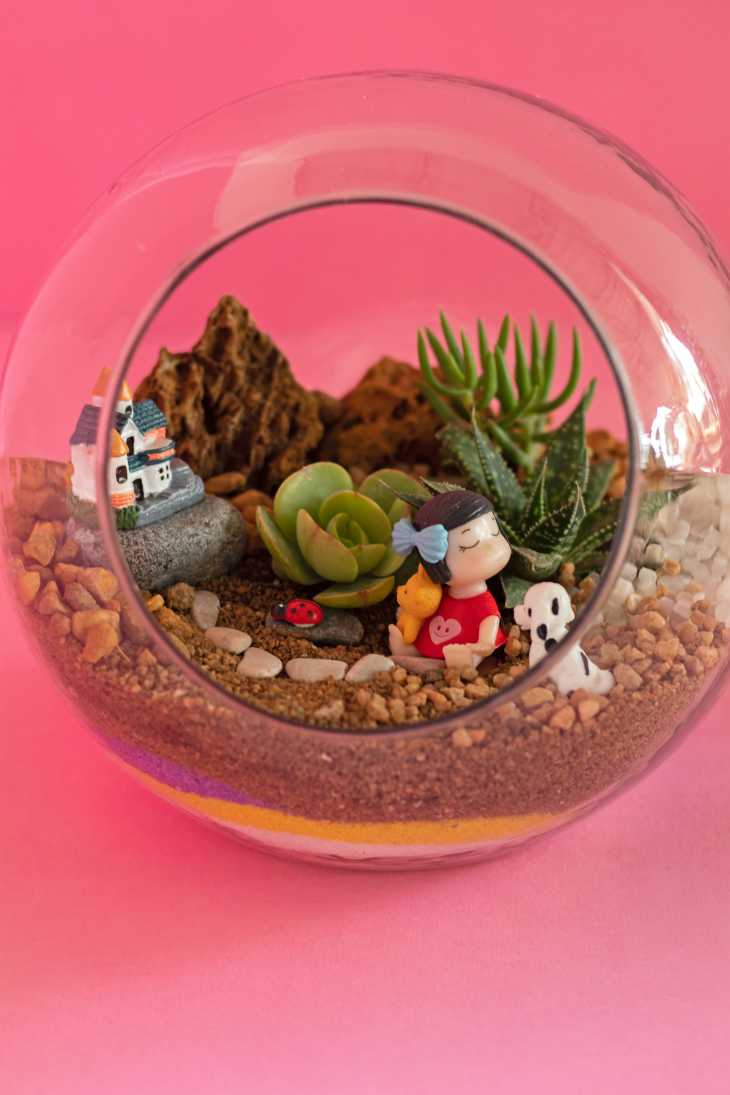
Terrariums are sealed or open glass containers that contain plants and soil. When moss is grown in a terrarium to create different vibrant landscapes, it is called moss terrarium. These glass containers have no drainage holes. When the temperature rises in a sealed container, the water vapors from soil and plants evaporate and then condense. Eventually, these drops of water again fall on the plants.
Instead of a root system, mosses have rhizomes. They absorb water and nutrients in their bodies instead of rhizomes. Also, they are super easy to care for and maintain and need only a small amount of substrate to grow.
Naturally, they grow in damp and shady places such as logs, rocks, and trees. If you take care of proper moisture and airflow, mosses can last in terrariums for more than a year and so.
How to Make a Moss Terrarium?
For making a moss terrarium, you’ll need a type of moss that matches your climate. There are more than 20,000 species of moss. The best moss for terrariums are:
Clumpy moss (Acrocarpous) includes cushion/ or bun moss (Leucobryum glaucum) and mood moss (Dicranum scoparium). These are ideal for closed terrariums. Moreover, you can easily sculpt and display them.
Carpeting moss (Pleurocarpous) includes sheet moss (Hypnum curvifolium) and fern moss (Thuidium delicatulum).
Sphagnum Moss (Peat moss)
Java Moss (Taxiphyllum barbieri)
Material Required:
You’ll require these materials for making your DIY moss terrariums.
Glass Container with a lid.
Substrate (Perlite potting mix or sand)
Moss
Craft for terrarium decor such as pebbles, marbles, stones, rocks.
Small houseplants such as oak tree saplings, or ferns.
Water spray bottle
Instructions:
Clean the glass container.
Place some marbles, rocks, or pebbles at the bottom of the glass jar.
Add a thin layer of the substrate at the top of the pebbles.
Arrange the layer of moss over the substrate and gently push it down to set.
Now add decors to give it a more natural look.
Your DIY moss terrarium is ready.
Watch this video to learn more clearly about DIY terrariums.
How to Take Care Of Moss Terrariums?
Moss terrarium care tips are mentioned below:
Mist your terrarium once daily.
Keep it away from direct sunlight.
If you are setting a terrarium for pets, make sure to provide some ventilation.
Place the terrarium in a room where the temperature remains between 68-85 degrees F.
It should receive indirect morning and evening sunlight to photosynthesize.
Where You Can Buy DIY Terrarium Kit Set?
You can purchase DIY moss terrarium kits from:
3. What Is Driftwood Succulent Centerpiece?

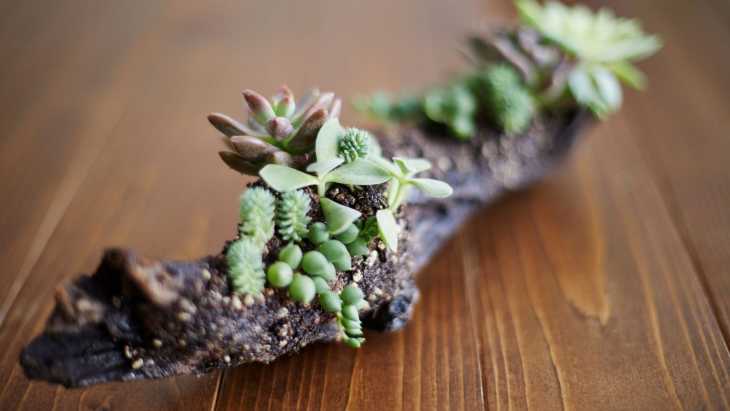
Driftwood is the wood that you normally find on the beaches, and shores near seas and lakes. It is washed on the shores by strong waves and winds. If you love giving a unique look to your interiors by adding classy decors, you can drill holes in the driftwood and grow colorful succulents in them. Then you can place it on a table, it is named a driftwood succulent centerpiece.
How to Make a DIY Driftwood Succulent Centerpiece?
Making a DIY driftwood succulent centerpiece is quite easy. Have a look at the material required and the steps for making it.
Material Required:
Well dried natural driftwood pieces (You can collect them from shores)
Succulents such as sedums, Crassula, Echeveria, variegated aeoniums (Rooted or cuttings)
Succulent potting mix
Sphagnum moss
A bucket of water
Electric drill
Floral Moss
Crafts for decor
Hot Glue
Wooden chopsticks
Instructions:
Soak the sphagnum moss in a bucket of water for 10 to 20 minutes. Squeeze it to remove excess water.
If the driftwood has natural holes, then you can plant succulents in these holes. If not, then use an electric drill for making holes. Be creative and drill holes as you want. Make sure to consider the size and shape of the succulents that you are using.
Avoid drilling holes to the bottom. They should be 2 inches deep.
Add coco coir at the bottom of the holes and then add the potting mix.
Remove succulents from the nursery pots and gently remove the dirt from their roots.
Place succulents in the holes and gently press to make them secure in the potting mix.
Use sphagnum moss to cover the loose spaces between the succulents by using chopsticks.
Use hot-glue to stick the crafts for more decoration.
Your DIY succulent centerpiece is ready.
Watch this video to learn the complete process of making a DIY succulent driftwood centerpiece.
How to Care for a DIY Succulent Centerpiece?
Water the driftwood soon after the arrangement and wet it completely.
Once the succulents develop roots, you can also hang the centerpiece on a wall.
Mist the soil once a day to keep it fresh.
You can expect this succulent arrangement to last for at least 6 months. If the plants grow bigger in the driftwood, take them out and plant them in the ground.
Where to Buy DIY Driftwood Succulent Centerpiece?
You can buy DIY Succulent Centerpiece kit from:
From local garden stores and nurseries
4. What Is Miniature Bonsai Garden?

Bonsai (Japanese: 盆栽, 'tray planting'[1] is a Japanese version of the original traditional Chinese art penjing or penzai.
How to Make a Miniature Bonsai Garden?
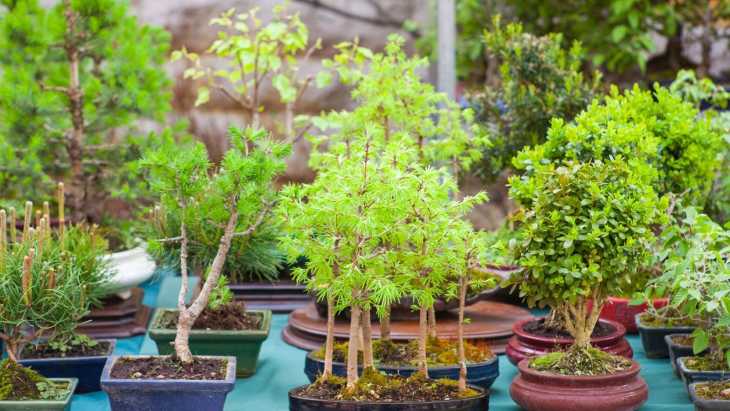
Miniature Bonsai grows to a height of 4 inches (10cm) and supermini Bonsai grow to about 1 inch tall. These Bonsai can be grown in bottle cap-sized containers. Growing such tiny plants can be great fun.
Material Required:
Acorns or pine cones as seeds
Miniature pots
Bonsai soil
Wire
Pruners
Water-filled container to place under plants.
Soaked Sphagnum moss
Instructions:
Select a separate pot for germinating seeds.
Sow acorns in the potting soil and keep the soil moist until the seeds germinate.
Select strong seedlings for repotting.
Place each seedling into a miniature bonsai pot after adding fresh soil.
Repot the seedling carefully and add a layer of sphagnum moss on the top.
Keep the repotted plant in a shady area for 1 week.
Regular pruning and pinching are required to get the desired shape of your miniature Bonsai.
Use wire to shape the trunk.
Watch this video to learn how to make a miniature bonsai garden in detail.
How to Care for a Miniature Bonsai Garden?
Soak the pot in a container filled with water so the tiny roots can absorb enough water. Water your miniature Bonsai garden once or twice a day during summer and once after 3 days in the winters.
2 to 3 hours of direct sunlight is crucial for these plants.
Add liquid fertilizer twice a month during the growing season.
Where You Can Get DIY Miniature Bonsai Garden Kits?
You can purchase DIY Miniature Bonsai Kits from