How to Make Fun Indoor Gardening With Family?
Last Updated: June 11th, 2021
Are you feeling depressed in the coronavirus lockdown situation? Are you getting bored by spending a lot of time at home? If yes, you are not alone. Many people are suffering from several psychological issues due to this abnormal routine.
Most people have taken to gardening to spend their time creatively. Isn’t it a great idea to kill the boredom? Of course, it is. If you live in an apartment or have limited space, you might be thinking it is impossible. Don’t worry. We have a solution for you. Why don’t you try this fun of indoor gardening with your family? Try your hand at growing Microgreens, hydroponic garden, herb garden, and DIY Greenhouse.
In this article, you’ll discover about microgreens, what microgreens you can grow at home, step by step to growing microgreens. Plus, you’ll learn about how to start a hydroponic garden for beginners. Furthermore, we will discuss herb gardens, types of herb gardens, and what to plant in a herb garden. Also, you’ll know the tips to create a DIY greenhouse at home.
Are you excited? Here we go…
1. Microgreens

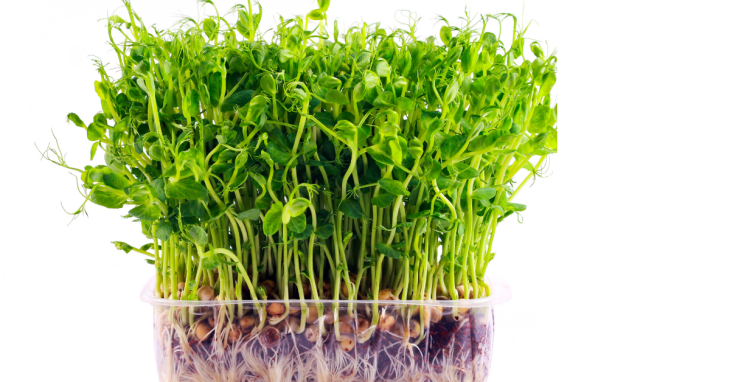
Let’s learn first about what microgreens are. Microgreens are small-sized leafy green vegetables having a strong aromatic flavor that are neither sprouts nor shoots. They are approximately 1–3 inches (2.5–7.5 cm) tall. Unlike sprouts, they are harvested 7 to 21 days after germination once they develop the first set of true leaves. These plants are bought alive until they are consumed.
Microgreens are easy to grow and maintain. You can place them at any location such as indoors, outdoors, windowsill, and even in the greenhouse.
Types of Microgreens
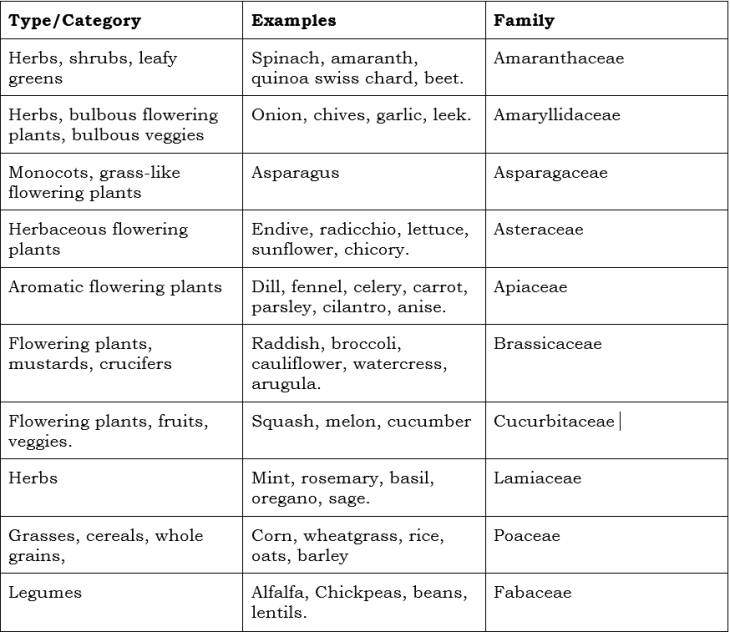
If you want to grow microgreens at home and you aren’t sure what variety to select, don’t worry. You can grow microgreens from any grain, such as rice, oats, barley, wheat, vegetable seeds, grasses, and herb seeds.
Let’s discuss some of the most common varieties of microgreens that you can grow as a beginner.

Note: Not all plants can be grown as microgreens. For example, the sprouts of the nightshade family (potato, tomato, peppers, etc.) can be toxic. You should be aware of the safety guidelines before growing microgreens to avoid the health hazards caused by eating certain poorly cooked sprouts. However, you can reduce the risk of soil-borne diseases by growing microgreens in single-use growing mats. Make sure to use the seeds from organic seed producers.
Benefits of Microgreens
By growing microgreens, you can not only have fun but you can also enjoy their long-listed health benefits. Some of these benefits are given below. So, have a look.
Microgreens are rich in nutrient contents such as potassium, zinc, iron, magnesium, copper. They have high levels of minerals, antioxidants, and vitamins as compared to mature greens.
You can reduce the risk of several diseases by including microgreens in your daily diet. These diseases include heart disease, Alzheimer’s disease, cancer, and diabetes.
How to Grow Microgreens at Home
You can easily grow microgreens at your home by following these instructions. First, have a look at the material required.
Material required:
Microgreen trays (alternatively you can use sturdy plastic trays with drainage holes)
Microgreen specific potting soil (If you want to use soil as a growing medium)
Coco coir (If you want to use a soilless medium)
Grow Light (30 watts LED if you don’t have enough sunlight. You can also place microgreens in a south-facing window where they can receive 4 to 8 hours of direct sunlight).
Labeling material or paper.
Spray bottle
Step by Step Guide:
Prepare the seed tray by adding a growing medium. Gently press the potting soil or coco coir in the seed tray.
Mist the growing medium. Place the seeds evenly above the surface and gently push them in the growth medium to maintain a good soil contact.
Soak the seeds with a harder coat in water overnight or a few hours before sowing.
Cover the seeds slightly with a growing medium. Lebel each tray with the name of the seed.
Keep the seeds under grow light if you don’t have enough sunlight.
Use a moisture dome, plastic wrap, or a plastic bag to cover the seed trays until they germinate. Keep the soil moist by misting it with a bottle.
Once the sprouts are a few inches and have developed a few true leaves, you can harvest and enjoy them.
Cut the sprouts just above the surface of the soil.
Tips to Grow Healthy Microgreens at Home
Use bottom watering for microgreens to prevent fungal growth. Take a solid tray filled with water and soak the bottom of the seed tray into it until the water infiltrates into the growing medium.
To enhance the shelf life of microgreens, avoid rinsing them.
2. Hydroponic Garden
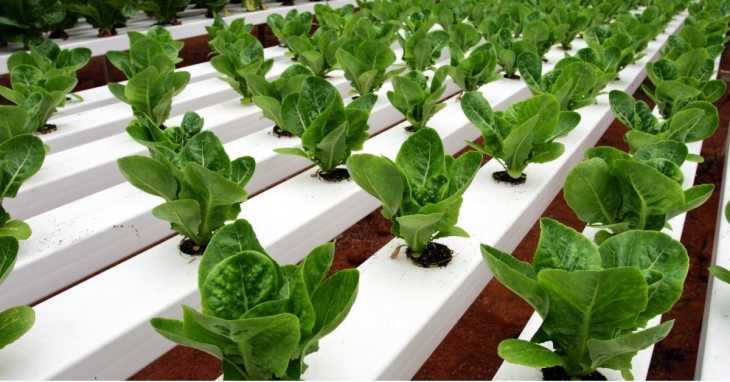
A hydroponic garden uses a hydroponic system to grow plants. Hydroponics is a system of growing plants in a nutrient-rich water solution instead of a conventional soil medium.

Here are the types of hydroponics suitable for beginners.
Wick hydroponic system: In this system, the nutrient solution is drawn by the capillary action of sponges and paper towels to the root zone of plants. It doesn’t involve the use of any motor, pumps, or moving parts to draw the solution.
Nutrient Film Technique (NFT): This technique involves passing a thin film of nutrient-rich water over the root system. Initially, it is a bit expensive than other systems. However, it needs less maintenance as compared to other systems daily.
Deepwater Culture (DWC): It involves suspending the roots of plants in a well-oxygenated nutrient-rich water solution.
Ebb and flow hydroponic system: In this system, the roots of plants are temporarily flooded with the nutrient-rich water pumped out of the reservoir below. The water is drained and returned to the reservoir by gravity and reused. Although it is easy to assemble and maintain, it may be complex for beginners.
Before selecting the type of hydroponic system, you have to consider the amount of space, the type of plant you’re using, your budget, and the number of plants that you want to grow.
For example, if you have a lot of space, like the entire basement, you can install an NFT system. It may need plumbing but it will save your time needed for the daily maintenance of your garden.
For small apartments, the ebb and flow hydroponic system works better.
Ways to Start Hydroponic Gardening
Let’s learn an easy step by step guide to starting a hydroponic garden at your home.
Material Required:
Rapid rooter plugs for seed germination
Grow trays
Heat mats
Selected Seeds
Full-spectrum LED grow light
Hydroponic system
pH meter
Hydroponic grow medium
Hydroponic nutrient solution
Step by step guide of setting a hydroponic system:
Firstly, you have to select the plants that you want to grow. You can grow veggies such as tomatoes, lettuce, bell peppers, spinach, and fruits such as strawberries. Also, you can grow herbs in your hydroponic garden. If you are a beginner, it is recommended to start with lettuce.
Germinate the seeds by using rapid rooter plugs. Use a heat mat to maintain seed temperature between 70 to 80 degrees Fahrenheit. Once the plants have developed a healthy root system, they are ready for transplantation.
Select a hydroponic system depending on your available space and budget. You can also use the ebb and flow system to grow any type of seed. If you are a beginner, start with a small hydroponic system. Now select a growth medium that works best on your selected system.
Add water to your hydroponic system and let it run out to check if there are any leak-outs. If everything is alright, add nutrient solution to the water and check the pH. Adjust the pH if required.
Place your plants in the solution and place them under the grow light if you don’t have enough sunlight at your home.
Tips to Grow Healthy Hydroponic Garden
You’ll plant a successful hydroponic garden only if you select the right equipment suited to your needs.
Do some research and know about the light requirement of the plants that you are growing.
Sterilize your system after every harvest.
Check and adjust the pH of the nutrient solution every day.
Change the water and nutrient solution after every two weeks.
Place new plants separately before adding them to your garden to avoid disease spread.
3. Herb Garden

A garden that includes only herbs is named a herb garden. Basically, it is a variation of container gardening. You can start a herb garden both indoors and outdoors.
Let’s read on to know why to plant a herb garden.
Homegrown herbs are rich in scent in flavor.
Herbs have a lot of health benefits.
Most herbs are natural insect repellents.
These plants give a unique flavor and aroma to your dishes.
Herbs are rich in nutrients.
Types of Herb Garden
The different types of herb gardens are mentioned below. Read on to learn what to include in your herb garden.
Kitchen Herb Garden: In this garden, you can include all the kitchen or culinary herbs used for cooking. For example,
Mint
Cilantro Thyme
Chives
Basil
Oregano
Rosemary
Fragrant Herb Garden: You can add all the high scented and aromatic herbs to this type of garden. These herbs are mostly used in scented candles, aromatherapy, and cut flowers. You can include these plants in your herb garden.
Lavender
Basil
Rosemary
Lemon Balm
Wormwood
Catmint
Ornamental Herb Garden: This type of garden mostly consists of herbs that have beautiful flowers and foliage. The ornamental herb garden includes:
Rosemary
Lavender
Echinacea
Chamomile
Sage
Medicinal Herb Garden: All the herbs that have medicinal value are planted in this garden. For example,
Holy basil or Tulsi
Echinacea
Southern Ginseng
Aloe
Feverfew
Herbal Tea Garden: This garden includes herbs that can be used for making different teas. For example,
Lavender
Chamomile
Hyssop
Mint
Anise
How to Grow Herbs at Home Step by Step
You can easily grow a herb garden at your home. You just need a small space, some amount of water, and a few hours of sunlight each day. Read on to learn a step-by-step guide.
Material Required:
Containers or small pots
Indoor potting mix
Compost
Herb seeds
Marker to mention
Step by step instructions:
Add indoor potting soil to the pot mixed with compost. Leave 2 inches of headspace.
Mist the soil, avoid adding too much water.
Add seeds to the soil. Select the seed depth as mentioned on the package depending on the seed type.
Place the containers indoors on the windowsill where they can receive 5 hours of direct sunlight.
Soon you can enjoy your healthy and fresh herbs.
4. Tips to Make DIY Greenhouse at Home

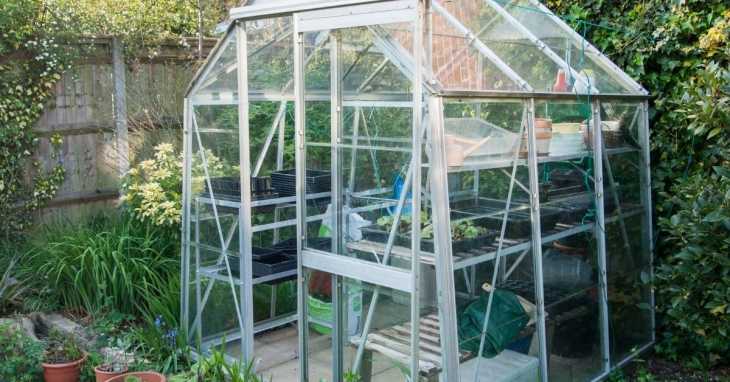
A greenhouse is a specially built space in which you can grow plants in a controlled environment. You can make your own greenhouse easily at home. Here is a step-by-step guide to making a cheap DIY greenhouse at your home.
Material Required:
½ inch PVC pipes (Required for 3ft by 7ft by 5ft height of greenhouse)
Glue
T joints for connecting PVC pipes
Plastic sheet
Step By Step Guide:
Make a design of your greenhouse on paper.
Cut the PVC pipes according to your design.
Join the cuts with T joints by using glue.
You’ll get a rectangular frame of the walls and roof of your greenhouse.
Take a plastic sheet and cover the roof of your greenhouse.
Then cut the plastic sheet to cover the 4 sides of your greenhouse.
Securely cover all the sides of the greenhouse with a plastic sheet.
5. Conclusion
Hopefully, you have enjoyed this article about growing microgreens, and herbs indoors. Now, you easily start a hydroponic garden at your home. Enjoy this lockdown situation and surprise your friend with a gift of a fresh harvest of herbs and microgreens. Moreover, by making your own DIY greenhouse, plant herbs, veggies, and fruits irrespective of harsh weather conditions.